System Image Installation and Backup
Flashing the OriginCar SD Card Image
Download the OriginCar SD Card Image
Download the SD card image for the robot from the table below, and extract the downloaded file.
| Version | Download Link | Included Software Version |
|---|---|---|
| v1.0.0 | OriginCar_sd_image_v1.0.0 | ros2: foxy |
| v1.0.0 | OriginCar_Pro_sd_image_v1.0.0 | ros2: humble |
Flash the SD Card Image
(1) Insert the SD card into the computer with a card reader. An SD card capacity of ≥16GB is recommended;
(2) Start the image flashing software (you can refer to Common Software to download it);
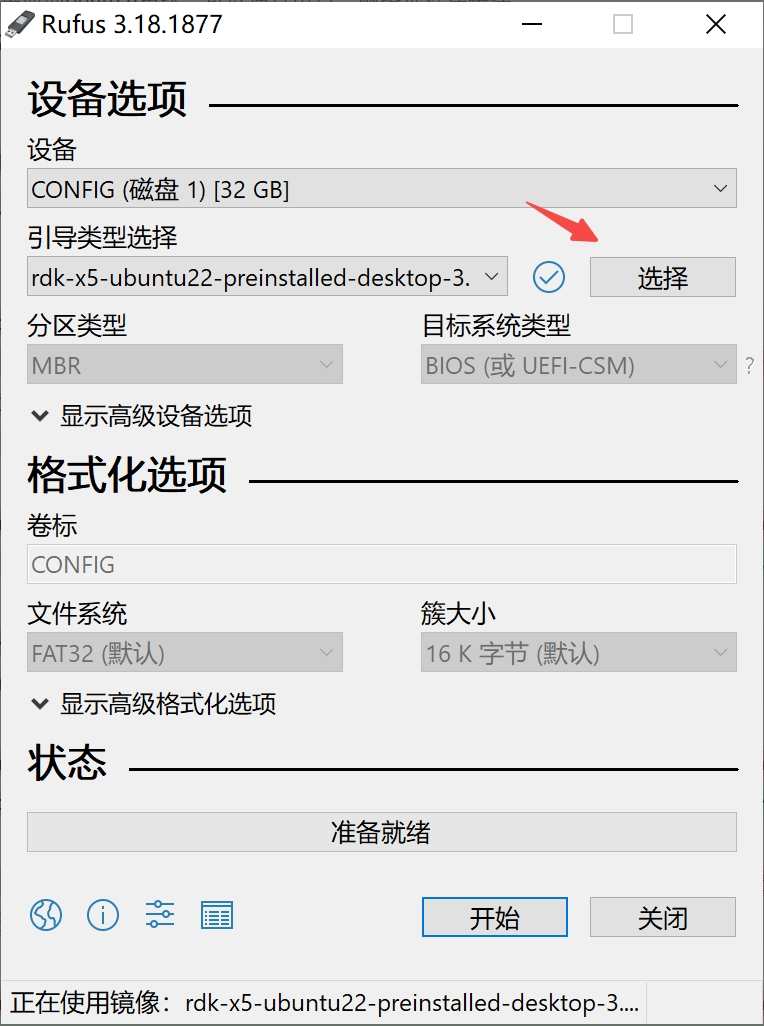
(3) Select the system image to be flashed and the SD card device number;
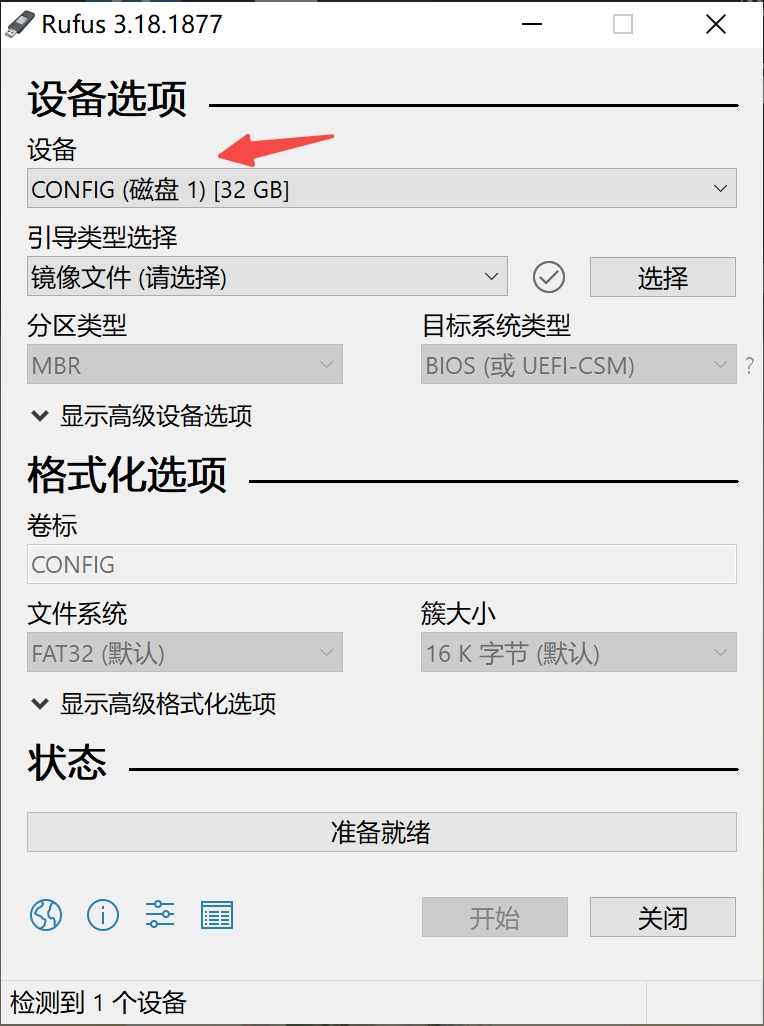
(4) Click "Flash" to start flashing the image;
(5) After flashing is complete, the software enters verification. Once verification finishes, you can exit the software.
Backing Up the OriginCar SD Card Image
The following backup procedure is completed in the Ubuntu system on the computer.
Shrink the Disk Space
To reduce the image size, we first use the gparted software to shrink the disk space of the SD card. Insert the SD card into a running computer, then install and start the gparted software:
In the gparted software that opens, select the SD card in the upper-right corner:

Then right-click and select the unmount option to unmount the SD card:

Continue by right-clicking and select the "Resize/Moves" option to reset the space size of the SD card:

Drag the right side of the space bar to shrink the space. Yellow indicates used partitions and white indicates free partitions. Be careful to keep some white free space, otherwise the image may fail to start.

After confirming, click the execute button in the software to start the shrinking operation.

When shrinking is complete, you can close the gparted software.
View Disk Information
Open a terminal and use the fdisk command to view the current disk information.

In the figure, /dev/sdb is the disk number of the SD card. Continue with the following command to view the SD card partition information:
Start the Disk Backup
Now you can use the dd command to back up the SD card to an img file.
$ sudo dd bs=512 count=[largest end number from the fdisk command + 1] if=/dev/sdb of=OriginCar_backup.img
After the backup is complete, the terminal command exits automatically, and the img image backup file is obtained in the current path.

The generated img image file is relatively large. If needed, you can use tools such as zip to compress and decompress it.
At this point, the SD card image backup is complete.
